The filler of burritos. The awesome meaty middle of huevos rancheros. Giver of life to tacos. If there were ever a dish that spoke to the hearts and minds of southern metalheads, ney, metalheads everywhere it would have to be chili. Properly prepared and cooked this dish has the power to fuel bands on the cheap from gig to gig, give roadies the energy to setup, tear down sets, and keep fans moshing for hours on end.
In this edition of Grim Kitchen we will be covering a chili that we believes exemplifies the slow, lazy, munchie craving genre of Doom Metal. Today we make Pork Chili Verde.

Soundtrack
The soundtrack for today's adventure brought to you by...
The Wounded Kings
In the Chapel of the Black Hand
What is PORK CHILI VERDE?
Chili Verde is a variant of the red tomato based concoction we all know as chili. Like tomato based chili, chili Verde hails from Mexico, but that's where the similarities end. You won't find any of the typical beans or chunks of tomatoes or onions in this stew. Instead it is made from blended tomatillos and a variety of green chili peppers. In a traditional tomato based chili you would typically find a whole host of herbs and spices added at different stages in the cooking process. Some people in this world are more likely to kill you than give you their recipe. None of that nonsense here. Chili Verde is flavored with a mix of cilantro (by the handful), garlic, and cumin. You can add more if you want, we added cayenne and oregano to the mix, but this is completely optional.


The Hunt
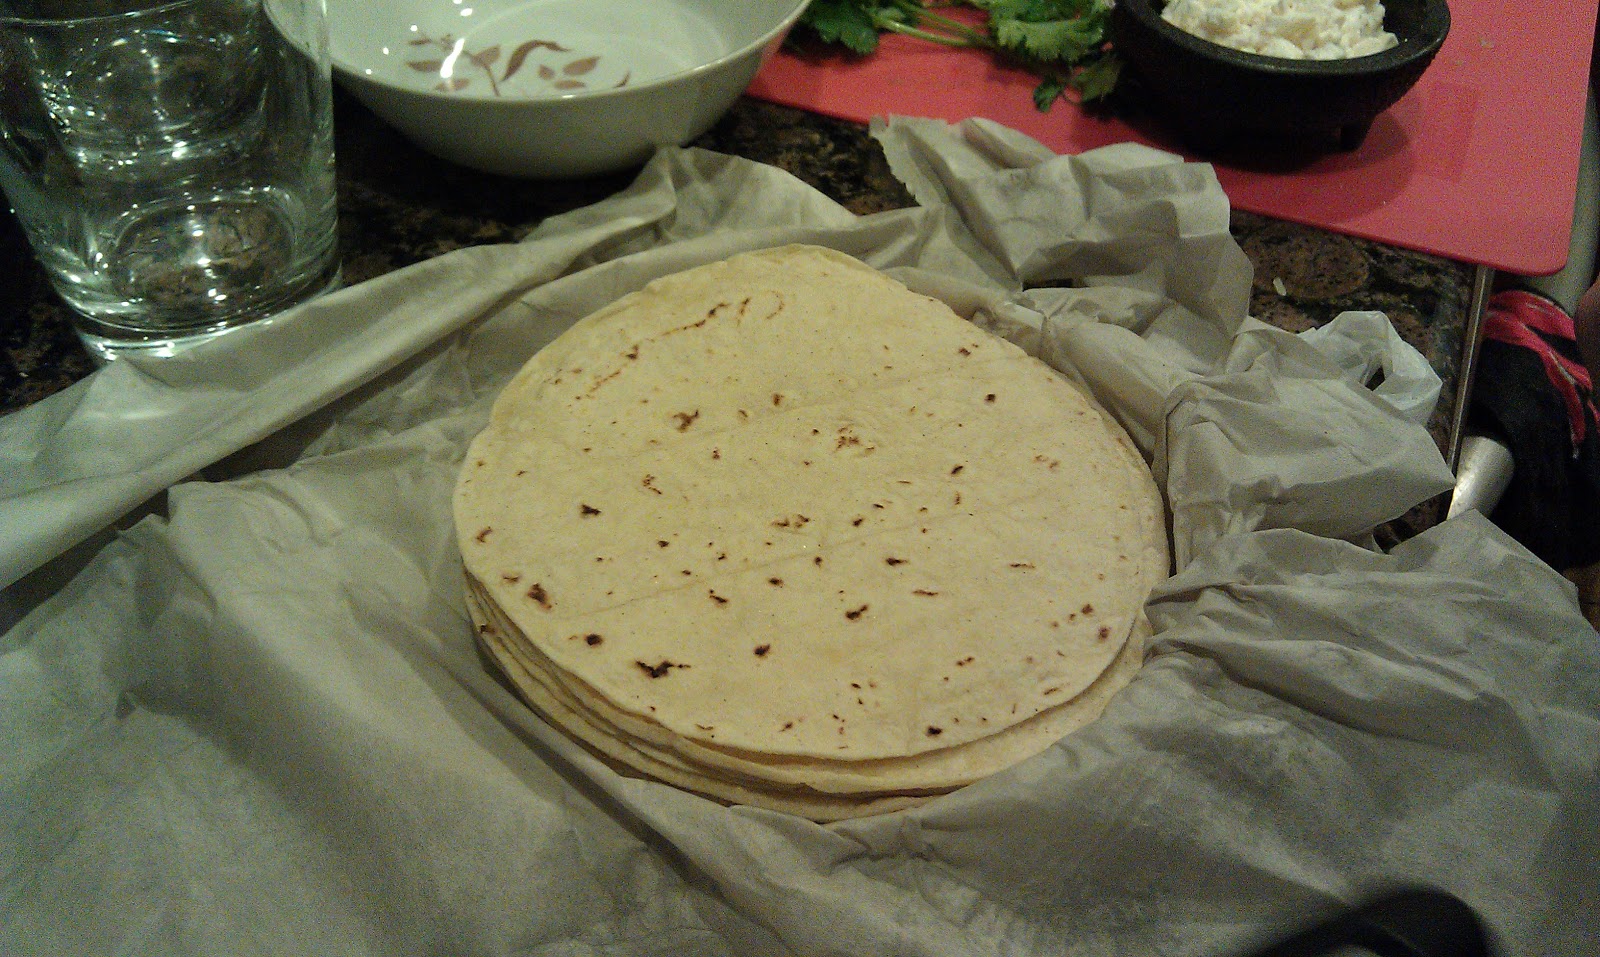
Some of these ingredients can be hard to come by in your local grocery store, so we set out to a great Philadelphia landmark, the 9th Street (or if you are a tourist...Italian) Market. Here you can find some incredible fresh ingredients on the cheap. They've got everything from butcher shops, to produce stands. Even an actual tortilla shop that rolls out fresh corn tortillas and is more than willing to give you free samples. They sell them by weight at $2/kilo. That's a little over 2lbs of hot, fresh corn tortilla goodness for $2. That's subway fare for over a months worth of taco containment.


Ingredients Pillaged
- 4 lbs of Pork Shoulder (deboned, trimmed and cubed)
- 2lbs Tomatillos
- 3 Jalapenos (or more if you want it spicier)
- 5 Poblano peppers
- 4 Cubanelle peppers
- 6 Whole Garlic Cloves
- 1 large Onion (roughly chopped)
- 2 cups of fresh Cilantro Leaves
- 1 quart Chicken Stock
- Oil for searing
- 1 teaspoon dried Oregano
- 1 teaspoon Cayenne
- 1 tablespoon Cumin
- Salt and Black Pepper to taste
Equipment Needed
- Slow cooker
- Saute Pan/Skillet
- Grill
Recipe
Step 1: Make Fire
In a chimney starter, light enough coals to cover at least half of your grill. Here we are working with a small grill, hence the small number of coals.

Step 2: Roast the Veggies
Next, you're going to have to roast the tomatillos, peppers, and garlic. The garlic is going to get roasted in a foil pouch until soft. The tomatillos and peppers however are destined for the flames. Literally. We are going to roast them until they start to turn black and the skin bubbles up. Keep turning them every few minutes to make sure they get evenly roasted. If you can't fit them all on your grill you can work in batches. We had to because 'Lil Smokey Joe here (yes that's his name) just wasn't able to fit all the veggies at once. When the peppers are done roasting cover them in a bowl and set them aside. This is also when you want to pull the garlic off the grill.


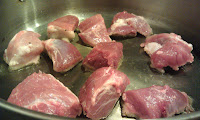
Step 3: Cube and Brown the Pork
Take that giant piece of meat, trim off all the excess fat and chop it into 1" pieces. Put a small amount of oil in a skillet and place over high heat. Working in small batches brown the meat and add oil as needed. The idea here is not to cook the meat all the way. You just want to cook the outsides so they are brown and slightly crispy. After each batch, place the browned meat into the slow cooker.


DO NOT throw away the browned bits at the bottom of the pan. They are packed with caramelized pork flavor goodness and you don't want to waste it. We'll see how to make good use of these little guys later.
Step 4: What the French call "fond" I call "Caramelized Meat Bits of Awesomeness"
You didn't throw those browned bits of pork away, did you? Good. It's called "fond" and it's going to add a whole new level of meatiness to this chili. Now take that onion we mentioned earlier and chop it up. A rough chop is fine here, they're going to be blended anyway. Now take the onion and put it in the pan with the fond and add a bit of the chicken stock to the pan. Using a wooden spoon or spatula scrape the fond from the bottom of the pan and dissolve it in the chicken stock. This is technically called a pan sauce. When the onions are softened take the pan off of the burner and set aside.


Step 6: Peel the Peppers
Remember those peppers we roasted. Uncover them an peel the skins off. They should be practically falling off at this point. You also want to remove the stems and seeds here.


Step 5: Blend the Sauce
Working in batches add the remaining chicken stock, skinned and deseeded peppers, tomatillos, garlic, cilantro, softened onions, and spices to the blender. Don't blend it too much, we want it a bit chunky. After each batch pour the blended sauce over the browned pork in the slow cooker.


Step 6: Wait...
After all the sauce is added set the slow cooker on high and wait. Go do something. Anything that takes 3-4 hours. When you come back the pork should fall apart when crushed with a fork. If it doesn't, keep waiting.


Step 7: Finish the Chili (Optional)
When the pork is fork shreadable, the chili is ready to eat. With this batch we noticed that it seemed a little thin and decided to reduce it. To do this, transfer all of the pork and some of the sauce to the saute pan and start shredding the meat up. Put the pan over medium-low heat and cook for 15-20 minutes. Reducing also concentrates the flavors. At this point you can return it to the rest of the chili sauce and mix or keep it separate and allow people to add additional sauce.


Step 8: Feast
This step is not optional. EAT. Serve it over rice, in tacos. in burritos, in pretty much anything remotely Tex-Mex and enjoy.


If you would like to see more detailed instructions take a look at the Instructable version available here.
For the original recipe head on over to Serious Eats.
\m/,
Tom
Equipment Needed
- Slow cooker
- Saute Pan/Skillet
- Grill
Recipe
Step 1: Make Fire
In a chimney starter, light enough coals to cover at least half of your grill. Here we are working with a small grill, hence the small number of coals.
Step 2: Roast the Veggies
Next, you're going to have to roast the tomatillos, peppers, and garlic. The garlic is going to get roasted in a foil pouch until soft. The tomatillos and peppers however are destined for the flames. Literally. We are going to roast them until they start to turn black and the skin bubbles up. Keep turning them every few minutes to make sure they get evenly roasted. If you can't fit them all on your grill you can work in batches. We had to because 'Lil Smokey Joe here (yes that's his name) just wasn't able to fit all the veggies at once. When the peppers are done roasting cover them in a bowl and set them aside. This is also when you want to pull the garlic off the grill.
Step 3: Cube and Brown the Pork
Take that giant piece of meat, trim off all the excess fat and chop it into 1" pieces. Put a small amount of oil in a skillet and place over high heat. Working in small batches brown the meat and add oil as needed. The idea here is not to cook the meat all the way. You just want to cook the outsides so they are brown and slightly crispy. After each batch, place the browned meat into the slow cooker.
DO NOT throw away the browned bits at the bottom of the pan. They are packed with caramelized pork flavor goodness and you don't want to waste it. We'll see how to make good use of these little guys later.
Step 4: What the French call "fond" I call "Caramelized Meat Bits of Awesomeness"
You didn't throw those browned bits of pork away, did you? Good. It's called "fond" and it's going to add a whole new level of meatiness to this chili. Now take that onion we mentioned earlier and chop it up. A rough chop is fine here, they're going to be blended anyway. Now take the onion and put it in the pan with the fond and add a bit of the chicken stock to the pan. Using a wooden spoon or spatula scrape the fond from the bottom of the pan and dissolve it in the chicken stock. This is technically called a pan sauce. When the onions are softened take the pan off of the burner and set aside.
Step 6: Peel the Peppers
Remember those peppers we roasted. Uncover them an peel the skins off. They should be practically falling off at this point. You also want to remove the stems and seeds here.
Step 5: Blend the Sauce
Working in batches add the remaining chicken stock, skinned and deseeded peppers, tomatillos, garlic, cilantro, softened onions, and spices to the blender. Don't blend it too much, we want it a bit chunky. After each batch pour the blended sauce over the browned pork in the slow cooker.
Step 6: Wait...
After all the sauce is added set the slow cooker on high and wait. Go do something. Anything that takes 3-4 hours. When you come back the pork should fall apart when crushed with a fork. If it doesn't, keep waiting.
Step 7: Finish the Chili (Optional)
When the pork is fork shreadable, the chili is ready to eat. With this batch we noticed that it seemed a little thin and decided to reduce it. To do this, transfer all of the pork and some of the sauce to the saute pan and start shredding the meat up. Put the pan over medium-low heat and cook for 15-20 minutes. Reducing also concentrates the flavors. At this point you can return it to the rest of the chili sauce and mix or keep it separate and allow people to add additional sauce.
Step 8: Feast
This step is not optional. EAT. Serve it over rice, in tacos. in burritos, in pretty much anything remotely Tex-Mex and enjoy.


If you would like to see more detailed instructions take a look at the Instructable version available here.


If you would like to see more detailed instructions take a look at the Instructable version available here.
For the original recipe head on over to Serious Eats.
\m/,
Tom
this sounds much like the recipe i used the very first time i made it, and i lost that recipe years ago... been winging it ever since, but today, i'm following your recipe!
ReplyDelete